Stewy Blogs

Fly fishing and other cool things

Page 2 of 3

Free Inquiry Blog Post #3: Potential spots to Fish

After getting my rod fully set up the next step in my inquiry is finding a spot to fish. There’s not big chum in the rivers at this point in the year so I’ll mainly be targeting trout in stocked lakes, and maybe some smaller rivers near Port Renfrew. The first spot Im planning on checking out is Kemp Lake. This lake is fairly quiet, and small but still a good size for fishing. It is also only 5 minutes from my house. https://maps.app.goo.gl/1dCqJq6JoQq9jEraA. It used to have a terrible dock but they put a new one in last year so it should be good as long as it isn’t busy. The next spot I plan on checking out is just down the road from Kemp Lake and is called Porier Lake. This lake is definitely a lot smaller than Kemp Lake but it has 2 fishing docks and Ive seen lots of eagles there so there has to be fish. https://maps.app.goo.gl/FvF6CDN3KtR5QFWS7. The next spot I want to check out is Peden Lake. This one is located up in the Sooke hills and the trailhead can be accessed from parking lot 2. https://www.alltrails.com/trail/canada/british-columbia/peden-lake-trail. I’ve hiked up to this lake before and there is definitely potential.
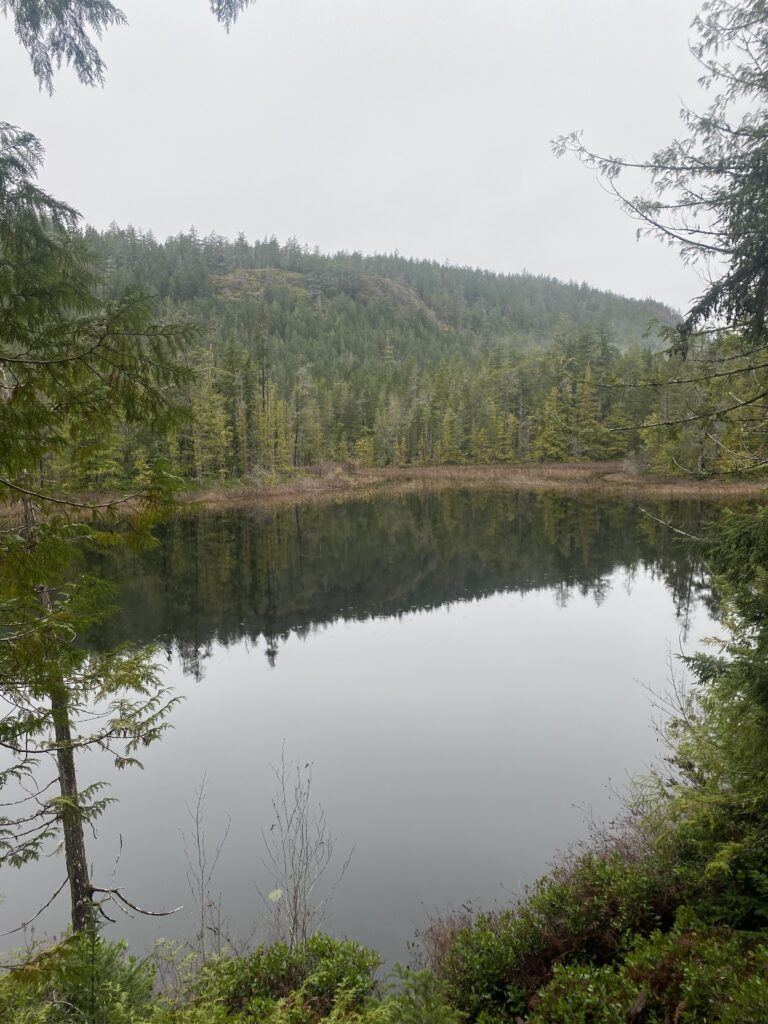
There is also other nearby lakes like Grass Lake, and Crabapple Lake I may check out when I’m up there. The next place I’d really like to go once I’m a bit better is the San Juan River https://www.google.com/maps/place/San+Juan+River/@48.5592633,-124.4286945,14z/data=!3m1!4b1!4m6!3m5!1s0x548ed0b52431cac1:0x6abac6a85673caf!8m2!3d48.5592373!4d-124.4080949!16s%2Fm%2F0fp_mm7?entry=ttu&g_ep=EgoyMDI2MDIxNy4wIKXMDSoASAFQAw%3D%3D.
Free Inquiry Blog Post #2: Knot Tying and Casting

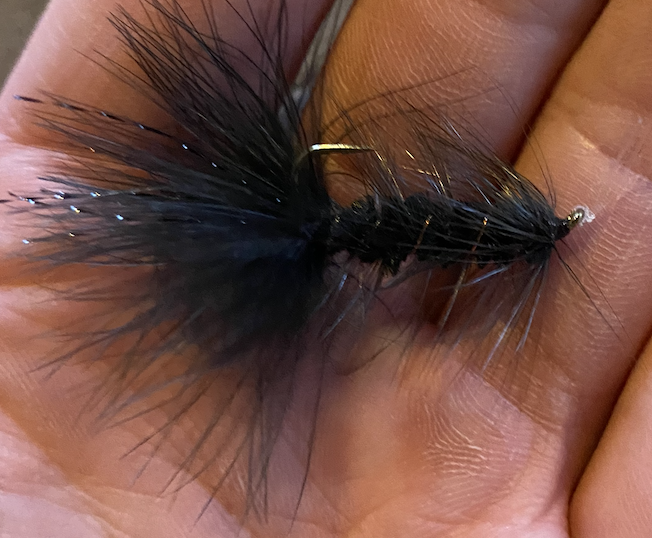
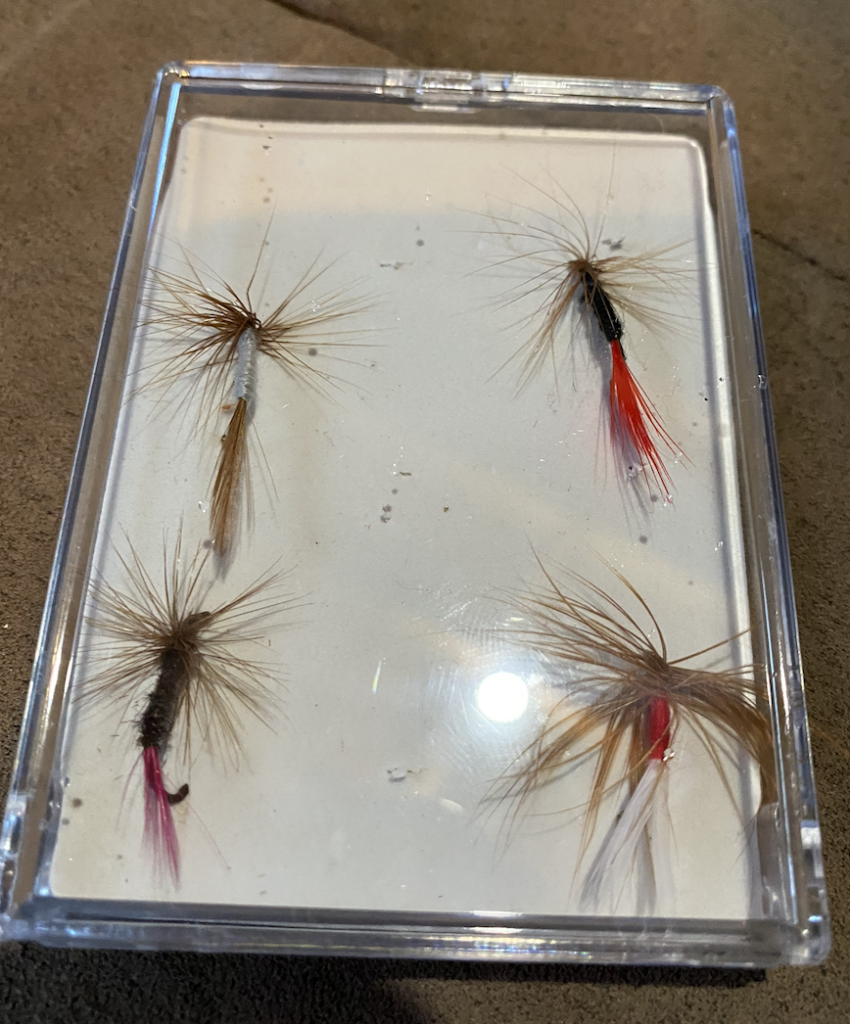
My last post ended with me going to pickup the necessary line for my rod. I managed to find all this pretty easily at the Canadian tire down the road. I got home unboxed the line, and realized something was wrong. Neither the floating line, or the leader had welded loops. This meant my previous plan wasn’t going to work. I did some research and found out that I would have to cut the initial backing loop off and attach the lines using an Albright knot https://news.orvis.com/fly-fishing/video-how-to-attach-fly-line-to-the-backing-on-a-reel. After attaching the backing and floating line I pulled the line through the eyelets and spooled it up. Then I had to use a nail knot to attach the leader to the floating line. Most of the tutorials I found for this knot featured an actual nail knot tool, I do not have this tool so I searched for awhile and found this video that really helped me https://www.youtube.com/watch?v=_qHmLKNcdm8. The Albright knot didn’t take too long but I struggled with the nail knot for awhile. First I had the leader upside down and was trying to use the very very thin end which I kept losing grip and sight of, then I just kept messing up, and finally after what felt like an eternity I got it. The final step was to attach the fly to the leader. I did this using the palomar knot https://www.youtube.com/shorts/v98DC3cSgWw. Ive done this knot many times when attaching lures for “regular” fishing so I was able to do it on the first try. I decided to attach a fuzzy black fly that I found in the basement, I also found 4 other smaller flys. After getting my rod fully set up I just had to run outside and test it out. I was so excited I forgot to film my first attempt but I was actually pretty good at it (I think). After I realized my mistake I ran back inside grabbed my phone and took a video which I will attach at the bottom of this post. I need to continue working on my final cast I think. I can get lots of line out but it starts to pile up around 30 feet. The knot tying struggle definitely taught me a lot of patience and really tested my fine motor skills.

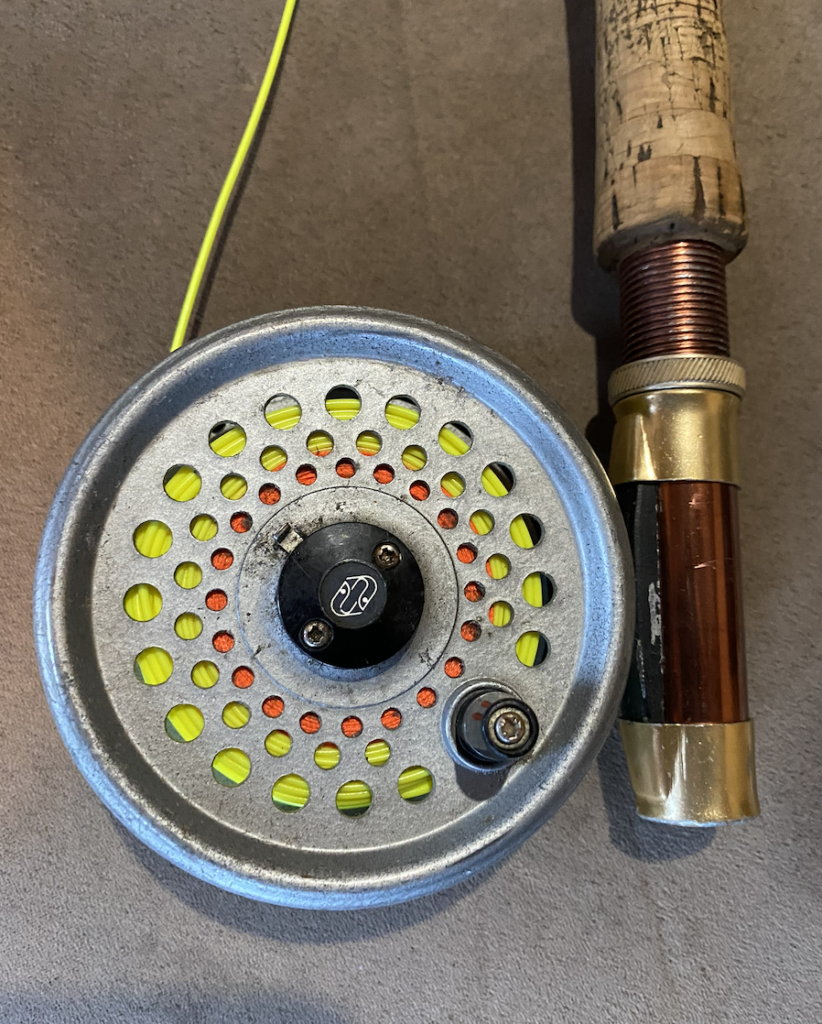
I forgot to take a picture of my albright knot and I wasn’t about to unspool my whole reel to take a picture of it so here is a picture of the fully spooled reel instead:

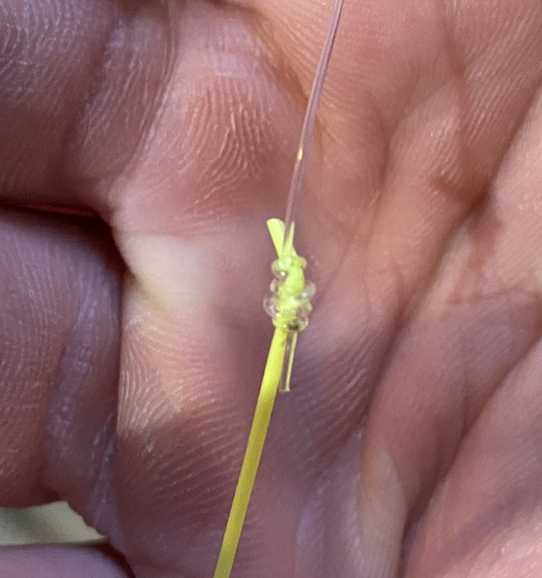
Here is a photo of the nail knot:

Here is a photo of the palomar knot and the fly:

Here is a photo of the other flys I found:

Here is a video of my casting practice in the yard:

Weekly Reflection #4

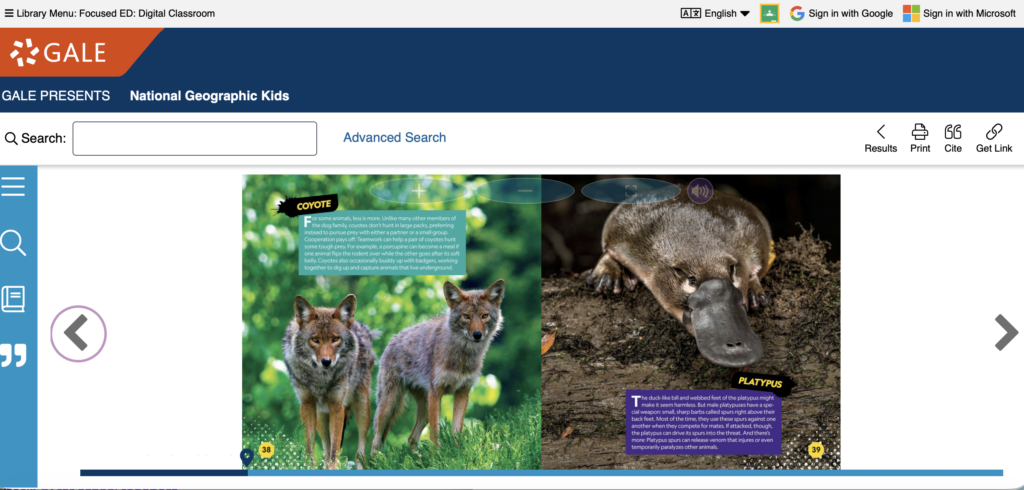
This week instead of having our typical zoom class we attended Focus ED AI education sessions. I attended the “NFB K-12: More than Just Great Canadian Films!”, and “The Digital Classroom for K-12 Teacher-Librarians & Leads”. We also got access to the Focus ED website that has so many resources for a variety of grade levels and content areas. I really liked the NFB resource, found some super cool lessons. One lesson I found to be particularly interesting was addressed the inquiry of why are mountain lakes often so blue https://blog.nfb.ca/blog/2024/05/09/edu-mini-lesson-for-losing-blue/. The site had a few in depth videos, summaries, activities, and more! I bookmarked this site to use in the future because it was so good. The info session I attended was on this site so it was even more impactful. Another site I found through Focus ED was national geographic kids https://go-gale-com.bc.idm.oclc.org/ps/dispBasicSearch.do?userGroupName=bcdc&prodId=NGMK. This site has so many resources about nature including magazines, books, posters, and videos. I really thought the books and videos were cool! I found this one on the “Deadliest Animals on the Planet”

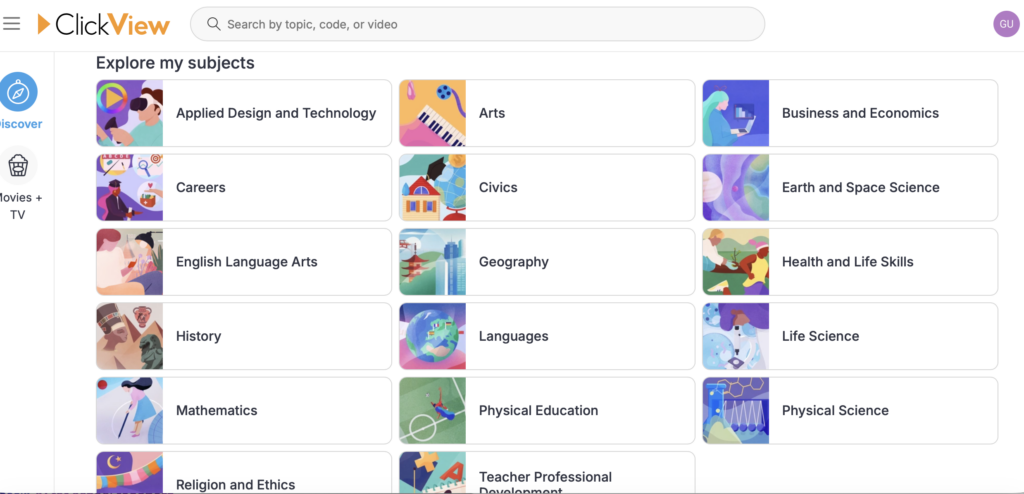
The next site I found through Focus ED was ClickView https://www-clickview-net.bc.idm.oclc.org/middle. This site has educational videos for many different subjects but it’s mainly for middle school. Even though Im planning to teach elementary school I still bookmarked this site as It could come in handy at some point!

I really found these resources and info sessions to be useful!

Weekly Reflection #3

So far I have been really enjoying this class. This week we learned about UDL (universal design for learning), UdB (understanding by design), and the ADDIE model/framework for education. I personally found UDL and UdB to be the most interesting.

UDL is a framework that aims to replace the traditional “one size fits all” education, it has 3 main requirements for lessons; 1. multiple means of representation, 2. multiple means of engagement, and 3. multiple means of expression and action. Multiple means of representation calls for the content to be taught in different ways as learners don’t learn the same way. Students should have access to many different forms of the content (Auditory, visual, physical, etc). Multiple means of engagement calls for lessons to tap into the students interests and adapt the difficulty to keep the motivation/engagement high. Multiple means of expression is an extremely important part of UDL, students should have control over how they are assessed and how they express their knowledge. This makes so much sense as every student has strengths and weaknesses, and should be assessed in a way that they can best express the information. An example of this would be instead of making all the students write an essay students should be able to choose from options like art, slideshow, essay, poster, and verbal presentations. https://a11y.canada.ca/en/universal-design-for-learning-udl/ . Here is a podcast on UDL that I found to be really good! https://www.cultofpedagogy.com/udl-equity/

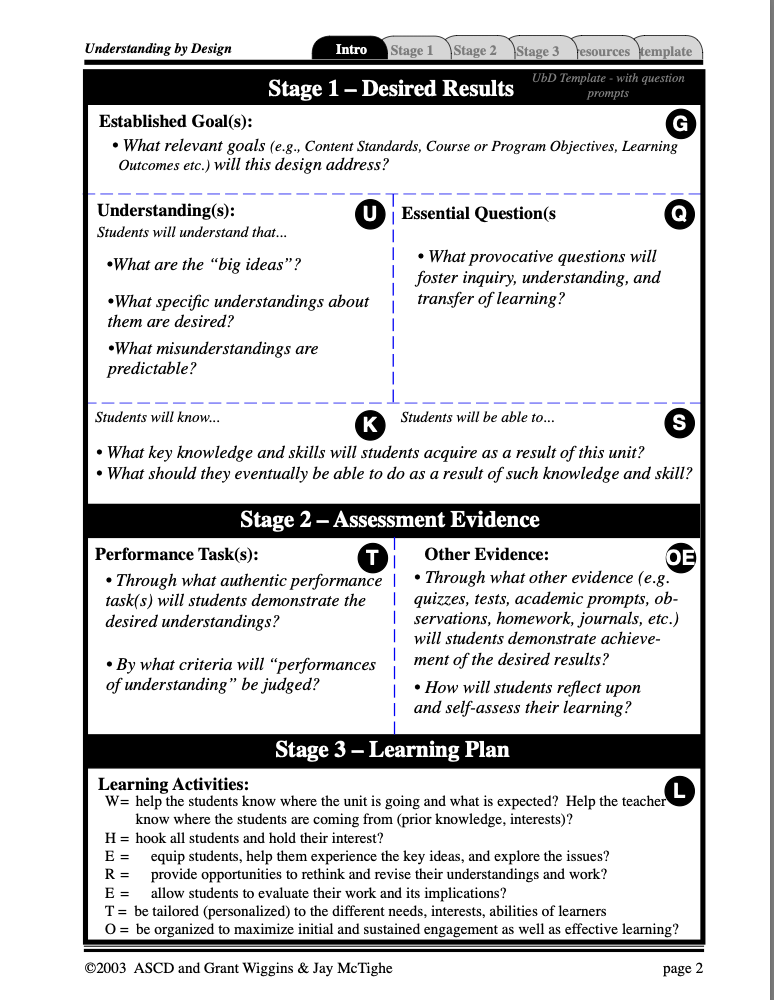
The UdB is a backward design framework that helps teachers plan effective lessons by starting at the end and working backwards. The UdB has 3 stages; 1. Identify desired results, 2. determine acceptable evidence, and 3. plan learning experiences. I really liked this framework, it makes sense and I will definitely be using it in the future!!! https://www.edutopia.org/sites/default/files/resources/stw-normal-park-normal-understanding-by-design.pdf

We also learned how to use AI to create lessons, assessments, and units that incorporate these frameworks and models. This was great and is something I will definitely continue to use!

Weekly Reflection #2

Generative AI can be a super useful tool for educators and teachers if used properly. However, there are some limitations. One of these limitations is accuracy and reliability. AI generated content often contains errors, outdated information, odd sources, or biased perspectives. If teachers don’t fact check and fine tune the AI generated content, they will end up teaching incorrect content to students or having lessons that aren’t effective and don’t make sense. This is a major reason why it’s crucial that teachers and students learn how to properly use AI and about the potential risks of using AI. Another limitation of AI is that you aren’t 100% sure where it’s drawing the content from, it could be pulling content from unreliable sources like Quora or Reddit. Generative AI will also seek information that supports your prompt, which can lead to incorrect and biased responses (https://www.icaew.com/technical/technology/artificial-intelligence/generative-ai-guide/risks-and-limitations). There are so many possible ways generative AI can be used in school. I would like to teach grade 3-4, and I think AI use is definitely acceptable for the teacher, and it could be introduced to students to help get them thinking critically about the information they see online. I would use it to help create lesson plans, brainstorm, draft unit outlines, resource lists, rubrics, self assessments, and more. It would be appropriate because I would always go over the generated content and personalize/fine tune it to ensure its effective quality content that would be engaging and benefit my class. I personally have found AI to be extremely helpful for educational purposes. I have used it to brainstorm, make lesson plans, rubrics, and self assesment forms. I have also used it for my own education. When I was studying exercise science I often had to have a very good understanding of complex concepts and processes that go on in the body. I used AI to help put these complex things into simpler words and create study packages. With that being said, I have found many errors and incorrect answers, fact checking the information and content is necessary. AI has many environmental impacts, such as high energy consumption, high carbon emissions, and high water use (https://news.mit.edu/2025/explained-generative-ai-environmental-impact-0117). AI also has privacy and security concerns related to data collection. A massive responsibility issue is academic integrity, it’s so easy for students to become over reliant on AI and even just directly copy and paste AI into their assignments and claim it’s their own work. This puts students at risk for plagiarism, and students do not actually learn the information.

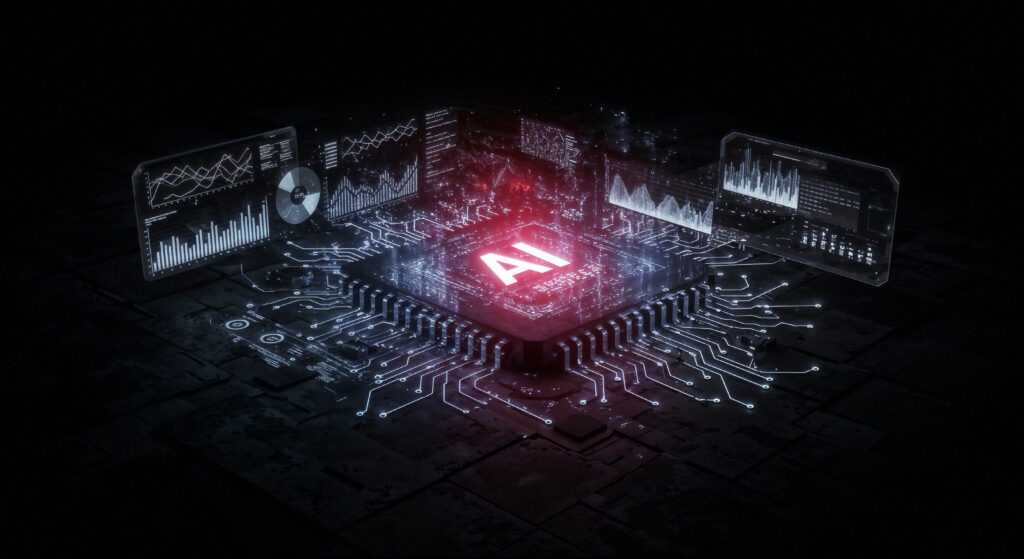
Source: FreePik: https://www.freepik.com/free-ai-image/artificial-intelligence-concept_417567953.htm#fromView=keyword&page=1&position=6&uuid=6f9be1de-5262-488a-9369-ee09b158dbb0&query=Ai+data

Free Inquiry Post #1: My Rod

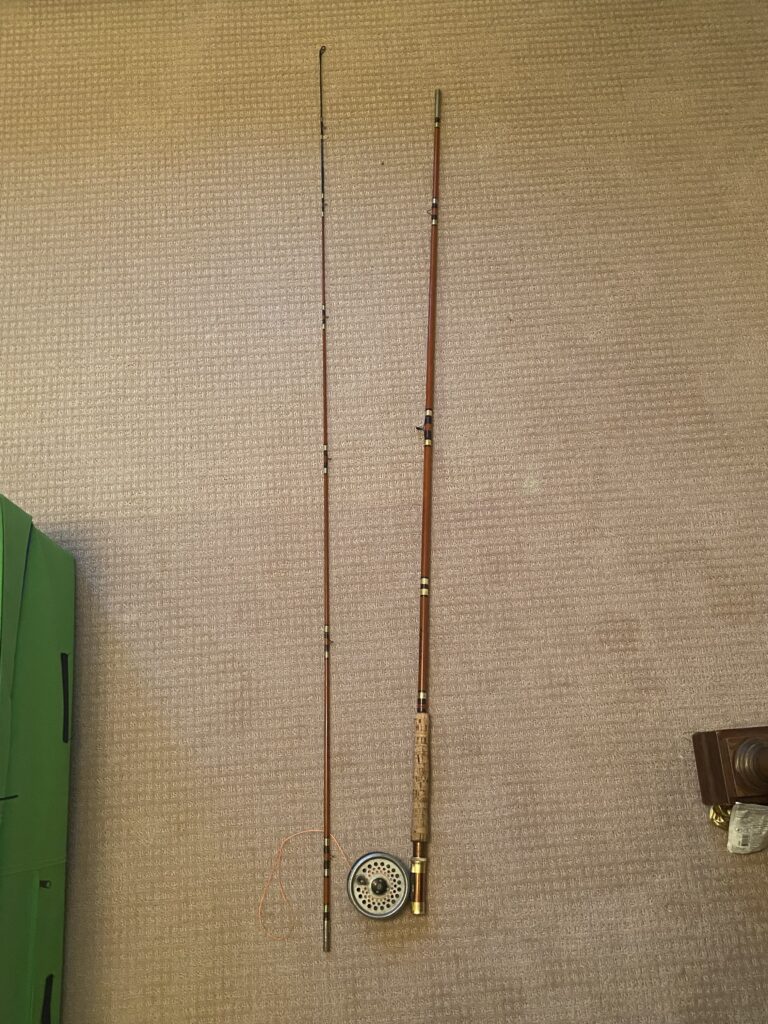
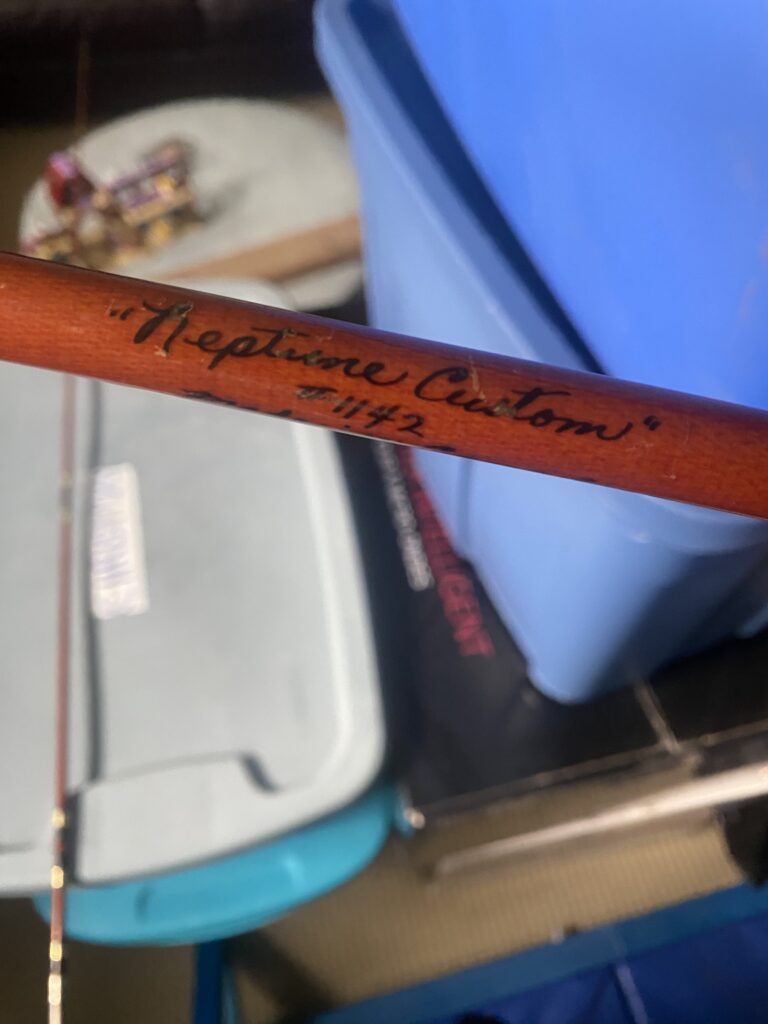
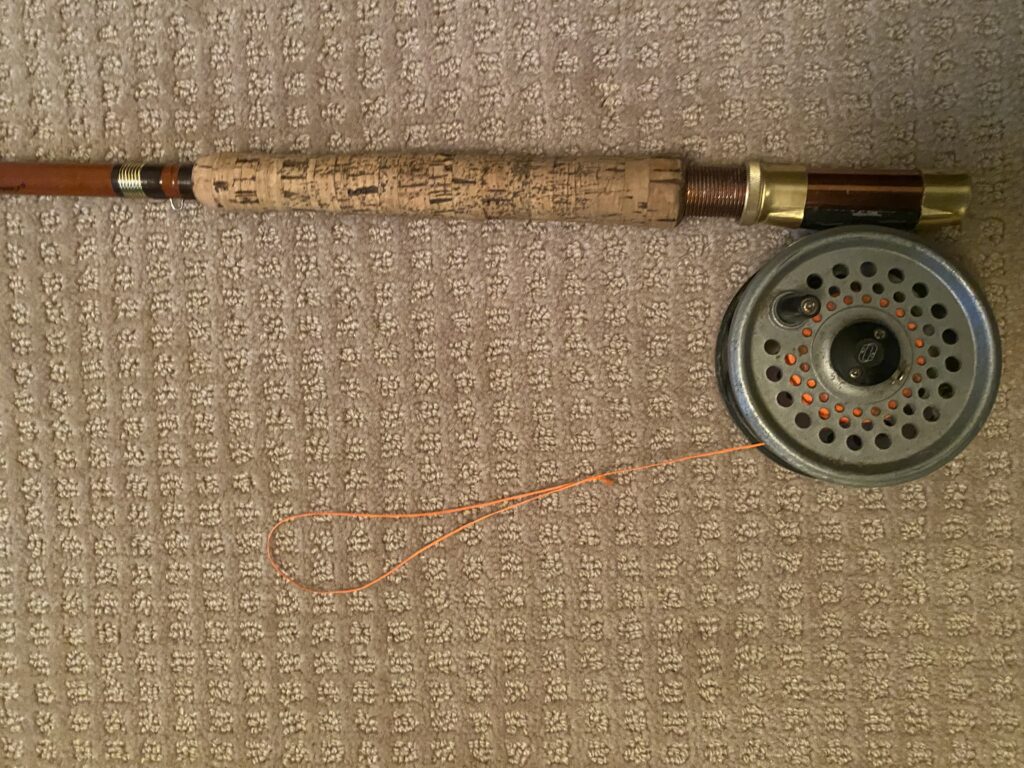
This weekend I drove back out to Sooke to pickup a fly rod and reel from my parent’s house. The reel already has backing line on it but I have no idea if it is still good. I figured learning to re line the rod/reel is a perfect place to start my inquiry. I began researching the line and was quickly surprised as the process itself is much different from a regular rod/reel and there are a few different things that go into choosing the right line. There are different weight lines, tapers (weight forward, double taper, and level), and different lines for different purposes (floating, sinking, and sink tip) https://theflyfishingbasics.com/fly-lines-101/. The first step was figuring out what fly line works best with my rod. My rod is fairly old and hand made in Canada. It doesn’t have the rod length or line weight listed on it, only its name, “Neptune Custom”, rod number, and “made in Canada”. I measured it and it’s 10.5 ft long and pretty wippy. I put this info and pictures of my rod into Chat GPT, it couldn’t identify a make or model but it recommended starting with a 7 wt weight forward floating (Wf7f) line and working from there. I also need to pick up some new backing line (the reel I found has some but it’s old) and a tapered leader. About 75-125 yards (depending on reel) of backing line is attached first using an arbor knot, it’s important to make sure there is tension on the line so that the line spools up tightly. The next step is attaching the fly line to the backing, there is usually a welded loop at the back of the fly line that can be easily cinched onto the backing and spooled up. The next step is attaching the leader once again using a welded loop and then pulling it through the rods eyes and attaching a fly (https://www.fishuntamed.com/blog/how-to-set-up-a-fly-reel). I plan to pickup the necessary line on Wednesday and practice my casting this week using YouTube videos to help model the correct movements. I plan to hike up into the Sooke hills in the next few weeks and try my luck at some remotely stocked lakes. Here is a picture of my rod:

Here is a photo of the reel itself and the old backing line.

Here is a quick and simple YouTube video that helped me a lot, especially with the knot tying.

Weekly Reflection #1

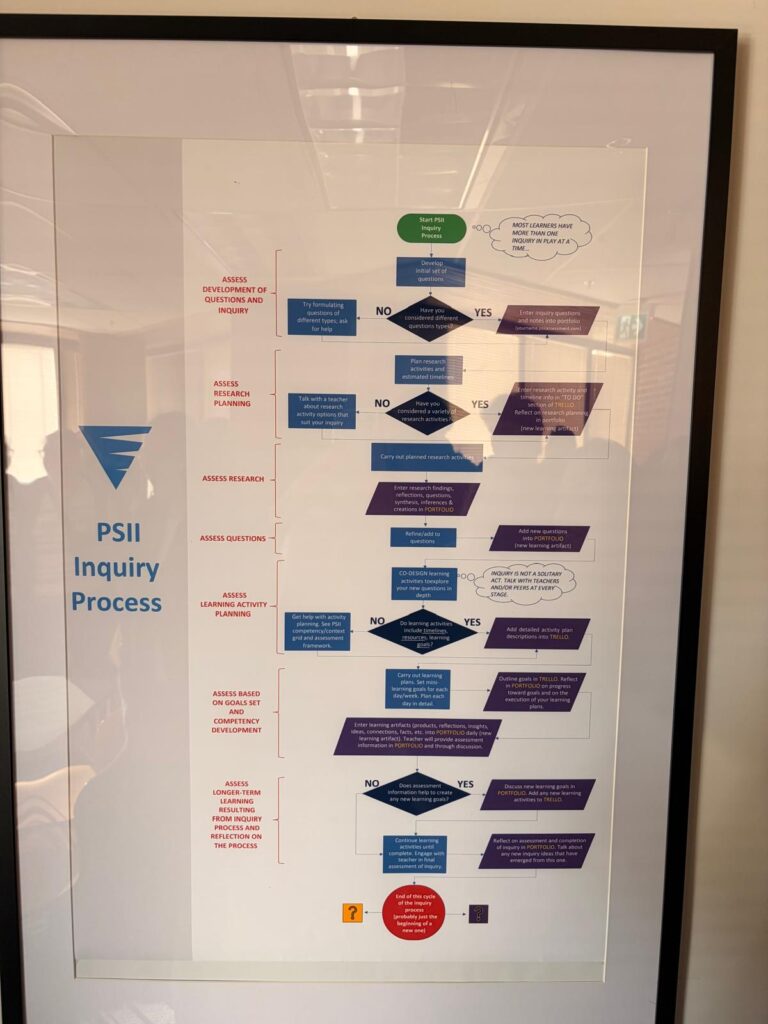
This week I was fortunate enough to go and explore the Pacific School of Innovation and Inquiry as apart of my tech class. I wasn’t sure what to expect as I had never been in an independent school before, I was pleasantly surprised to see how it was run. The way they do things there makes sense and allows children to follow their passions and learn other subjects using them. This increases motivation and understanding as students are actually interested. The students were all so quiet and focused on their work. The school itself was also very cool, I really liked the tech room they even had 3d printers for the kids to use. After seeing all of this I definitely think there are aspects of the education system that need to be changed/reimagined. Students need to be given the time and support to follow their passions and ask the questions they want to ask. This can be very hard for public school teachers as they have way bigger class sizes, have schedules and time restraints, less resources, less support, and more. One of the potential issues of this type of learning is how does it transfer to post secondary. One of the teachers daughters actually went to this school, she said her daughter found her undergrad degree to be boring and dry as it wasn’t all about exactly what she wanted to learn (found the masters to be much better), and that some of the standardized testing can be tough to get used too. I think the benefits outweigh the cons and that students should be given more control over their learning.

Blog #1

Finally got this thing up and running. Ive never had a blog so I’m looking forward to documenting my learning explorations on this site.

Welcome and Introduction

Before proceeding with this first blog post, we expect you to consider your privacy preferences carefully and that you have considered the following options:

  1. Do you want to be online vs. offline?
  2. Do you want to use your name (or part thereof) vs. a pseudonym (e.g., West Coast Teacher)?
  3. Do you want to have your blog public vs. private? (Note, you can set individual blog posts private or password protected or have an entire blog set to private)
  4. Have you considered whether you are posting within or outside of Canada? This blog on opened.ca is hosted within Canada. That said, any public blog posts can have its content aggregated/curated onto social networks outside of Canada.

First tasks you might explore with your new blog:

  • Go into its admin panel found by adding /wp-admin at the end of your blog’s URL
  • Add new category or tags to organize your blog posts – found under “Posts” (but do not remove the pre-existing “EdTech” category or sub-categories, Free Inquiry and EdTech Inquiry). We have also pre-loaded the Teacher Education competencies as categories should you wish to use them to document your learning. If you would like to add more course categories, please do so (e.g., add EDCI 306A with no space for Music Ed, etc.)
  • See if your blog posts are appearing on the course website (you must have the course categories assigned to a post first and have provided your instructor with your blog URL)
  • Add pages
  • Embed images or set featured images and embed video in blog posts and pages (can be your own media or that found on the internet, but consider free or creative commons licensed works)
  • Under Appearance,
    • Select your preferred website theme and customize to your preferences (New title, etc.)
    • Customize menus & navigation
    • Use widgets to customize blog content and features
  • Delete this starter post (or switch it to draft status if you want to keep for reference)

Do consider creating categories for each course that you take should you wish to document your learning (or from professional learning activities outside of formal courses). Keep note, however, that you may wish to use the course topic as the category as opposed to the course number as those outside of your program would not be familiar with the number (e.g., we use “EdTech” instead of “edci336).

Lastly, as always, be aware of the FIPPA as it relates to privacy and share only those names/images that you have consent to use or are otherwise public figures. When in doubt, ask us.

Please also review the resources from our course website for getting started with blogging:

« Older posts Newer posts »

© 2026 Stewy Blogs

Theme by Anders NorenUp ↑