Fly fishing and other cool things

Category: Free Inquiry (Page 1 of 2)

This is the category to apply to your Free Inquiry posts.

Free Inquiry Post #8: Inquiry Reflection

I found this inquiry assignment to be really cool and fun. I learned how to do some really cool stuff and learned about my learning process. I learned so much about the basics of fly fishing, and how to properly set up a fly fishing rod.
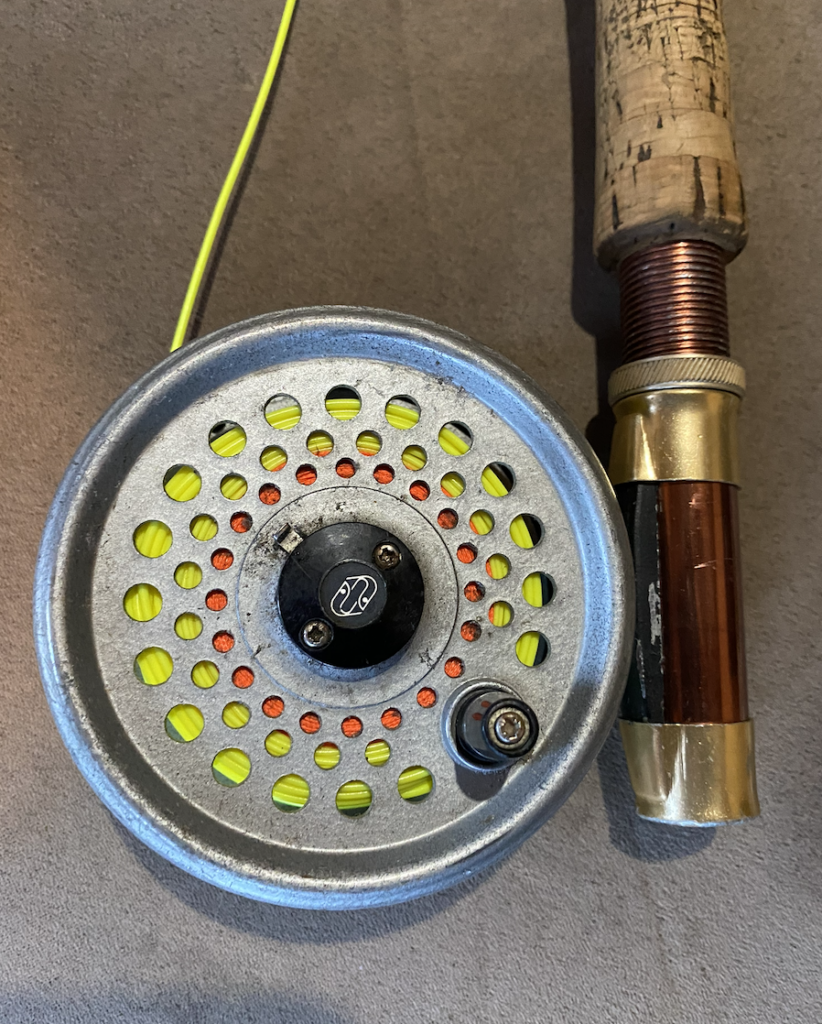
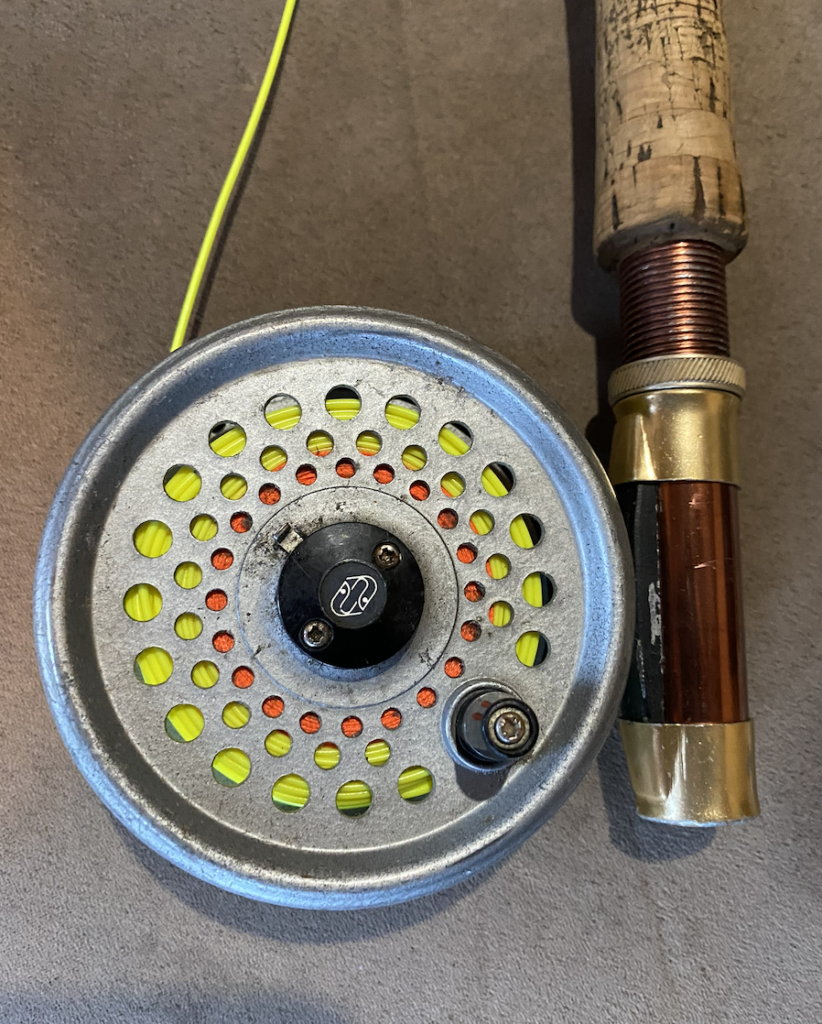
My fully lined fly reel

I think the hardest part of this inquiry was the knot tying. I found learning the different types of knots to be super difficult. It took me so long to learn to tie the Albright knot, and even longer to tie a nail knot. The fact I was trying to tie the wrong end of the leader to the floating line didn’t help. I had never attached a leader before and didn’t know one end was thinner than the other. I was able to work through these difficulties by watching YouTube videos and replaying them in slow motion so I can easily follow the knot patterns. While I did succeed in my knot tying there were a few points where I almost gave up, but I didn’t. I remained patient through the difficulties. Here are the videos I found helpful: https://www.youtube.com/watch?v=_qHmLKNcdm8, https://news.orvis.com/fly-fishing/video-how-to-attach-fly-line-to-the-backing-on-a-reel, https://www.youtube.com/shorts/v98DC3cSgWw

I wasn’t able to go fishing anywhere near as much as I had initially hoped when I began this inquiry. This was mainly due to school assignments and homework but I really wish I was able to get out more. However I am really happy that I know the basics of the sport and am ready for next fall’s salmon run.
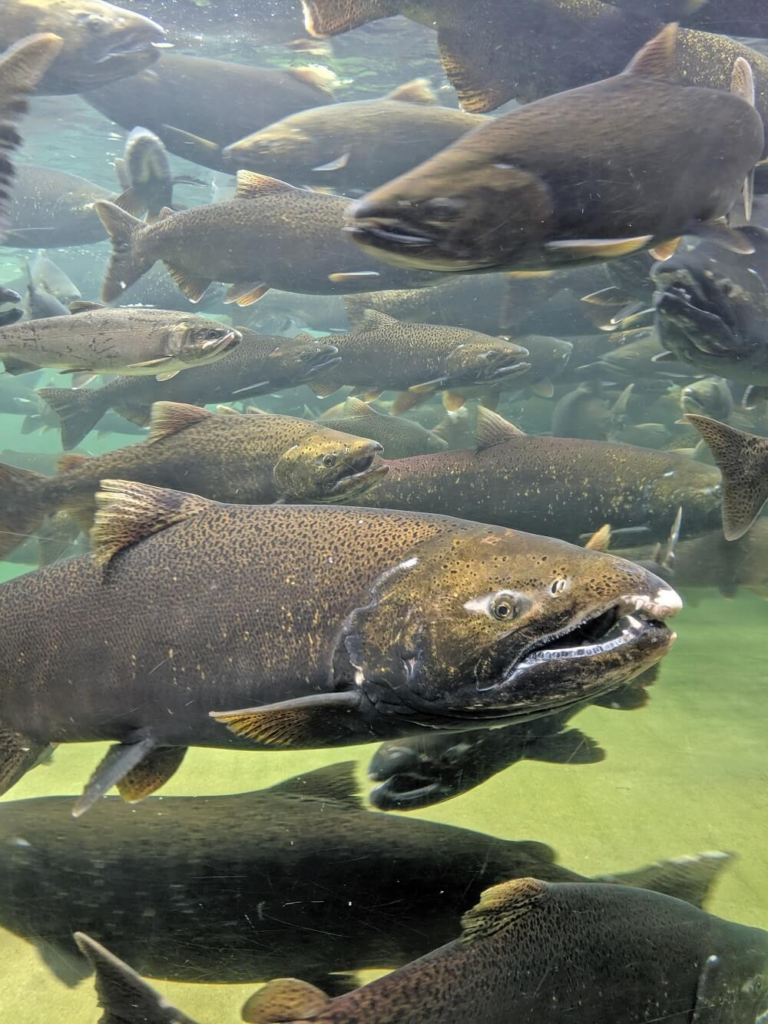
Salmon in the Puntledge River courtesy of offtracktravel

Image Source: https://offtracktravel.ca/where-to-see-salmon-run-british-columbia/

For my last inquiry blog I switched from fly fishing to the Roman Empire. I did this because, I have to teach a unit on the Roman Empire, and my knowledge on this subject is almost none (The Gladiator movies). I found this site to be extremely useful and informative: https://www.britannica.com/place/Roman-Empire

Before this assignment I had never made a blog or even created a website. I found learning this process to be slightly frustrating at times but very useful. I remember when I was first designing my blog/webpage I couldn’t figure out how to change the colours or the background photo’s. Once I figured this out I found it really fun and satisfying to edit the pages looks and layout. This is a skill I could definitely see being useful in the classroom.

Free Inquiry Blog Post #7: The Roman Empire

For my upcoming practicum I have been told I am teaching a unit on the Roman Empire. I was super enthusiastic about this, and then I realized I knew absolutely nothing about the Roman Empire. So Ive decided for my last inquiry blog I would look into the Roman Empire and prepare myself. My first few questions are; how long did the Roman Empire last, who led the Roman Empire, and how powerful was the Roman Empire.

I started by doing some online research on the Roman Empire. I started by simply searching up “introduction to the Roman Empire”. The first site that came up was “Britannica” (https://www.britannica.com/place/Roman-Empire). From this website I learned that the Roman Empire was centred around the city of Rome, and was created in 27 BCE (Before Christ Era), after the fall of the Roman Republic. In 395 AD it separated into western and eastern empires, the Western Empire ended in 475, and the Eastern Empire lasted until 1453 as it morphed into the Byzantine Empire.

Image source: https://www.freepik.com/free-ai-image/view-ancient-roman-empire-colosseum_76739370.htm#fromView=search&page=1&position=2&uuid=be2bb532-d6ab-4b2c-821f-d03271a69188&query=Roman+empire

I also found out that the first Roman Emperor was Augustus, he was in power from 27 BC to 14 CE (Christ Era). He came into power after the assassination of his uncle Julius Caesar and his victory at Actium. Augustus was the first but there were so so so many other leaders, too many to list. here is a link to all of the leaders; https://www.britannica.com/place/Roman-Republic. I wanted to go a bit more in depth on this topic so I searched up “who were the most impactful roman emperors” and this history website came up (https://www.history.com/articles/timeline-emperors-roman-republic). It provides a list of 11 Roman Emperors who molded the ancient world. The first two spots were held by Julius Caesar, and Augustus. The third spot was taken by a man named Tiberius who apparently did a great job at acquiring land for Rome. his Military conquests were held in very high regard however, He was not interested in being an emperor or politician. He was solely about violence and conquering land. Under his rule Romes territory went into present day Croatia and Germany. While looking through the list I recognized one of the names “Marcus Aurelius” from the first gladiator movie. I didn’t know that he was a real historical figure. Marcus Aurelius is widely viewed as the emperor philosopher. He wrote pieces that are considered to be philosophical canon. He claimed that being a clear and unbiased thinker was the key to universal reason.

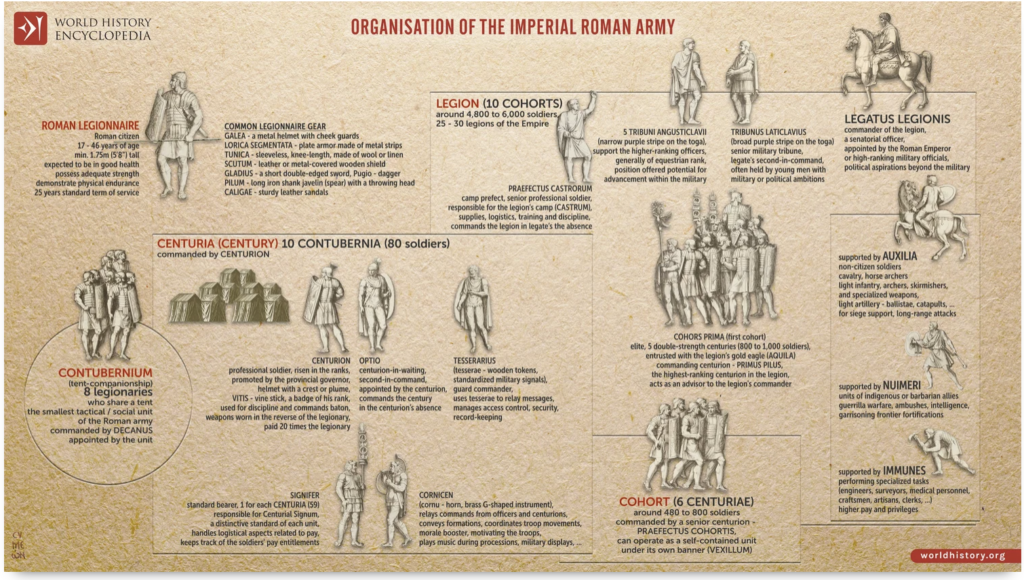
The Roman Empire was extremely powerful and had the most impressive army of the ancient civilizations (https://www.worldhistory.org/Roman_Army/). The military was extremely disciplined, organized, and innovative. They fought with ferociousness and strategy. They had weapons that others didn’t have access to which provided a large advantage. This army was able to take over and conquer a crazy amount of land.

Image Source: https://www.worldhistory.org/Roman_Army/ by Simeon Netchev

Next, I will look into the fall of the Roman Empire and what caused it.

Free Inquiry Blog Post #6: Porier Lake

Free Inquiry Blog Post #5: Kemp Lake

Free Inquiry Post #4: Types of Flies

I was about to head out to the ponds and realized I was skipping a massive step in my approach. I hadn’t done any research to figure out what colour/size flies to use. for this I asked Chat GPT to give a list of recommendations based on my area and season. Here is the prompt I used: “create a list of appropriate fly fishing flies for trout in sooke bc, in february. I plan to fish kemp lake, porier lake, and peden lake.”, and here Is Chat GPT’s response:

Here’s a good list of fly patterns to try for trout in stillwater lakes around Sooke, British Columbia (Kemp Lake, Poirier Lake, Peden Lake) in February. Winter/early-season conditions in coastal southern BC mean trout are often less active, feeding deeper and on subsurface food sources, so focus on nymphs, small midges (chironomids), leech/buggy patterns, and balanced flies under an indicator. 

🐟 Proven Patterns for Stillwater Trout (Winter / Early Season)

🪱 • Chironomid / Midge Patterns

These small midges are a staple food source for trout in many BC lakes year-round — especially early in the season when other insects are scarce. Fish them under an indicator close to the bottom. 

  • Black-and-Red Chironomid (classic ice-off pattern)
  • Olive/Grey Chironomid Pupa patterns
  • Black Sally or Olive Chromie
  • Blob flies / Beadhead chironomids in dark colours

💡 Tip: Sizes around 14–18 work well on stillwaters; use darker colours in winter. 


🐛 • Leech & Balanced Nymph Patterns

These mimic leeches, damsels, and general small prey that trout feed on in cold water. Fish these under a strike indicator or slow strip. 

  • Balanced leech patterns (black, olive, brown)
  • Woolly Bugger (black or olive) — balanced or weighted
  • Woolly Worm (general-purpose nymph/bug pattern) 

🪲 • General Nymphs / Traditional Patterns

These imitate mayfly larvae, scuds, and other aquatic prey trout take near the bottom — useful when chironomids aren’t active. 

  • Gold Ribbed Hare’s Ear nymph
  • Prince or Prince-ish style nymph
  • Scud/shrimp imitations in olive or tan

🪶 • Streamer / Attractor Patterns (Slower Retrieve)

In colder months fish are sluggish but can react to larger profiles. Stripping slowly near deep weed edges or drop-offs can trigger strikes. 

  • Mickey Finn (broadbaitfish impression) 
  • Dark streamer patterns in black/olive/brown
  • Balanced leech streamers

☁️ • Dry Fly – Limited but Useful

In February hatches are rare, but if you see fish taking insects on the surface or if warm spells bring bugs up:

  • Elk Hair Caddis or small dries in darker colours (size 12–18) 

🎯 General Tips for Fly Fishing These Lakes in February

Change depths slowly. Early season trout often roam deeper; adjust your leader/dropper length until you find fish.

Go subsurface first. Trout are usually deep and feeding slower this time of year. Nymphs/chironomids work better than dries. 

Use an indicator. Especially with chironomids or balanced flies — let the pattern hang 1–4 feet above the bottom. 

Dark colours are key. Black, olive, brown or grey silhouettes stand out in low light, cold water. 

OpenAI. (2026, February 20). Proven Patterns for Stillwater Trout [Large language model]. ChatGPT. https://chatgpt.com/c/6998b85a-2084-8330-85d9-c3c7b42f9086

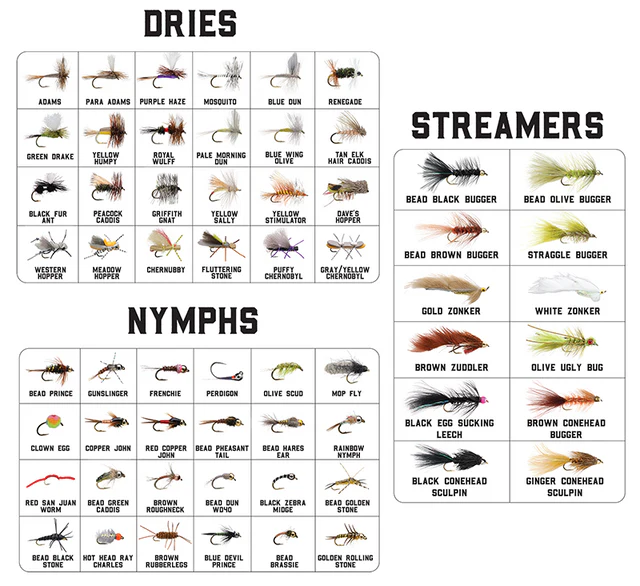
Right now I only have a few flies and they are fairly small so I will need to go buy some more or learn to tie my own flies! I think I will try to get some brown/black Nymphs and streamers as I’ve seen leeches in a few of the lakes I plan to fish. Here is a picture of a fly box that shows the different types of flies.

This box costs $165 American so I will definitely be finding cheaper options but it illustrates the differences in flies. https://smittysflybox.com/products/trout-box?srsltid=AfmBOooBMDHuMefFVGd5gKixry1AHnLbAKlOWCEgbMAwSKn2AiV3I4bo. I will be heading to Island Outfitters in Colwood today to check out some flies so I can get out and catch some fish.

Free Inquiry Blog Post #3: Potential spots to Fish

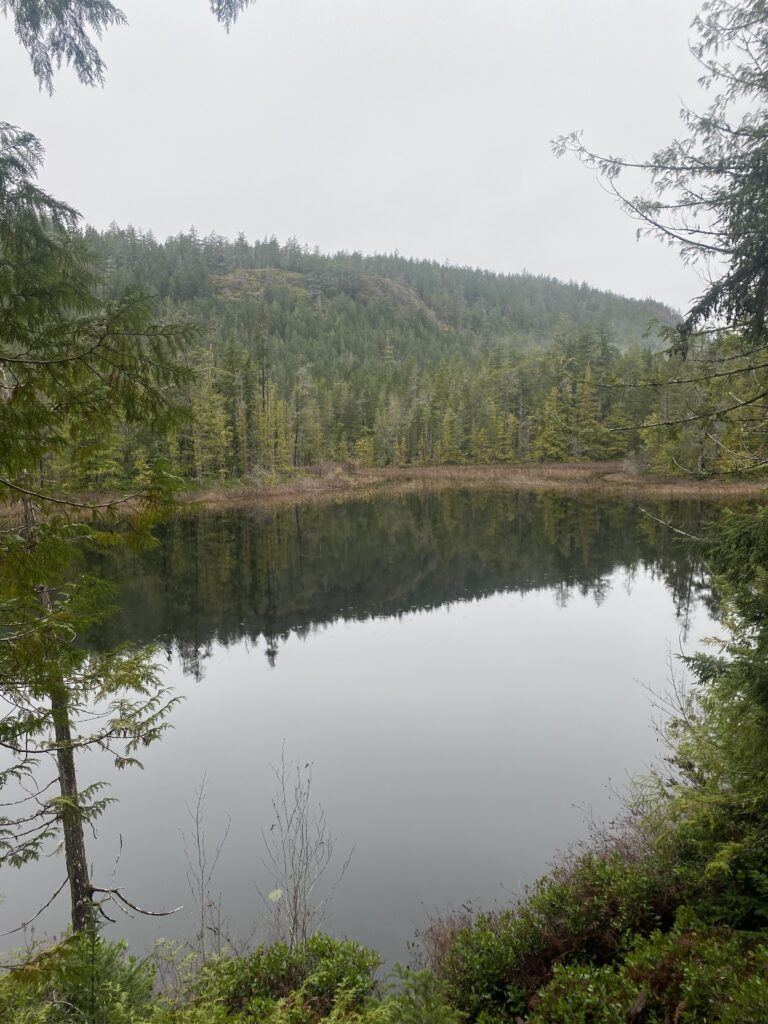
After getting my rod fully set up the next step in my inquiry is finding a spot to fish. There’s not big chum in the rivers at this point in the year so I’ll mainly be targeting trout in stocked lakes, and maybe some smaller rivers near Port Renfrew. The first spot Im planning on checking out is Kemp Lake. This lake is fairly quiet, and small but still a good size for fishing. It is also only 5 minutes from my house. https://maps.app.goo.gl/1dCqJq6JoQq9jEraA. It used to have a terrible dock but they put a new one in last year so it should be good as long as it isn’t busy. The next spot I plan on checking out is just down the road from Kemp Lake and is called Porier Lake. This lake is definitely a lot smaller than Kemp Lake but it has 2 fishing docks and Ive seen lots of eagles there so there has to be fish. https://maps.app.goo.gl/FvF6CDN3KtR5QFWS7. The next spot I want to check out is Peden Lake. This one is located up in the Sooke hills and the trailhead can be accessed from parking lot 2. https://www.alltrails.com/trail/canada/british-columbia/peden-lake-trail. I’ve hiked up to this lake before and there is definitely potential.

There is also other nearby lakes like Grass Lake, and Crabapple Lake I may check out when I’m up there. The next place I’d really like to go once I’m a bit better is the San Juan River https://www.google.com/maps/place/San+Juan+River/@48.5592633,-124.4286945,14z/data=!3m1!4b1!4m6!3m5!1s0x548ed0b52431cac1:0x6abac6a85673caf!8m2!3d48.5592373!4d-124.4080949!16s%2Fm%2F0fp_mm7?entry=ttu&g_ep=EgoyMDI2MDIxNy4wIKXMDSoASAFQAw%3D%3D.

Free Inquiry Blog Post #2: Knot Tying and Casting

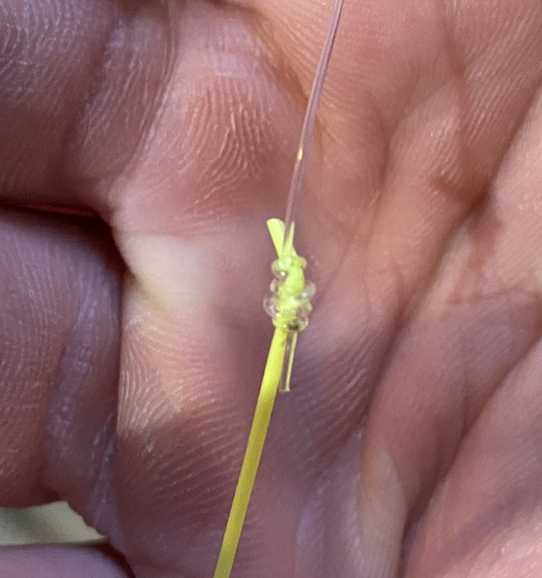
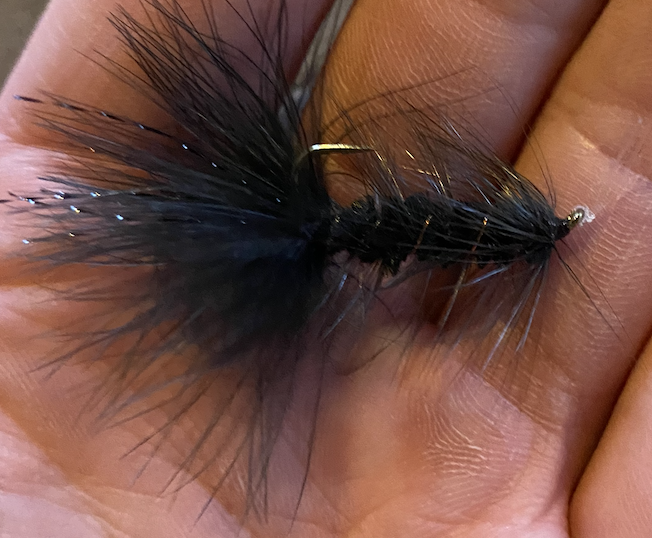
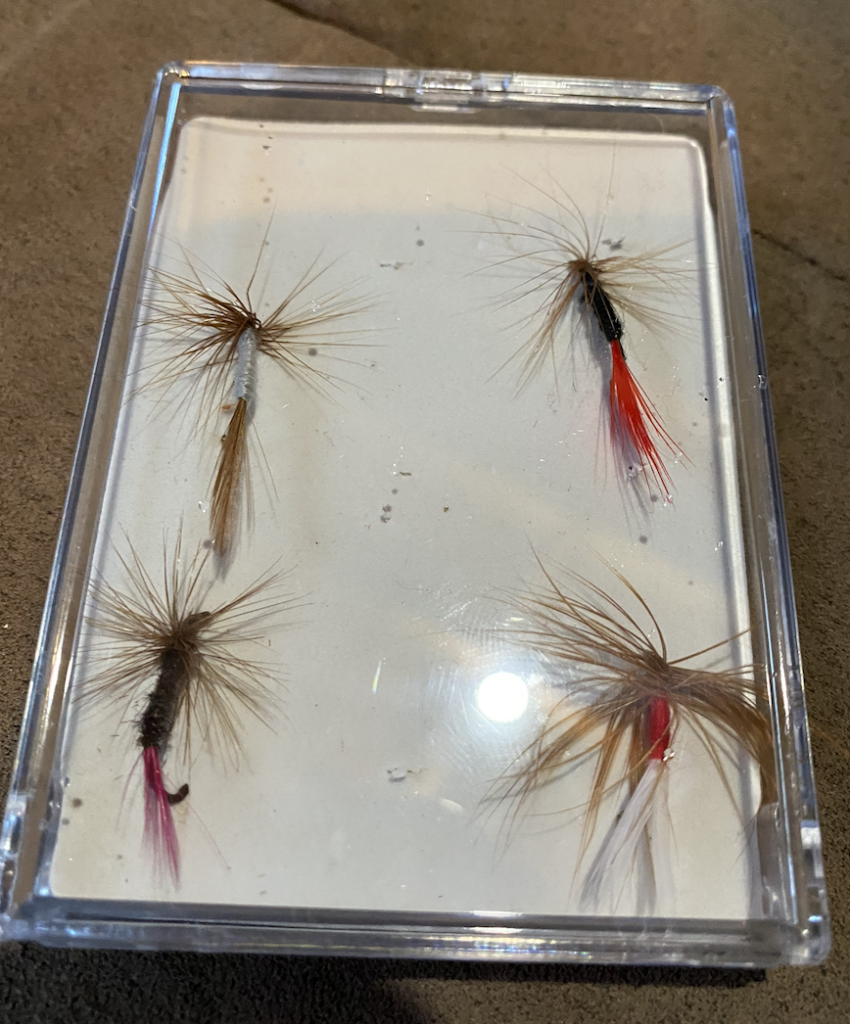
My last post ended with me going to pickup the necessary line for my rod. I managed to find all this pretty easily at the Canadian tire down the road. I got home unboxed the line, and realized something was wrong. Neither the floating line, or the leader had welded loops. This meant my previous plan wasn’t going to work. I did some research and found out that I would have to cut the initial backing loop off and attach the lines using an Albright knot https://news.orvis.com/fly-fishing/video-how-to-attach-fly-line-to-the-backing-on-a-reel. After attaching the backing and floating line I pulled the line through the eyelets and spooled it up. Then I had to use a nail knot to attach the leader to the floating line. Most of the tutorials I found for this knot featured an actual nail knot tool, I do not have this tool so I searched for awhile and found this video that really helped me https://www.youtube.com/watch?v=_qHmLKNcdm8. The Albright knot didn’t take too long but I struggled with the nail knot for awhile. First I had the leader upside down and was trying to use the very very thin end which I kept losing grip and sight of, then I just kept messing up, and finally after what felt like an eternity I got it. The final step was to attach the fly to the leader. I did this using the palomar knot https://www.youtube.com/shorts/v98DC3cSgWw. Ive done this knot many times when attaching lures for “regular” fishing so I was able to do it on the first try. I decided to attach a fuzzy black fly that I found in the basement, I also found 4 other smaller flys. After getting my rod fully set up I just had to run outside and test it out. I was so excited I forgot to film my first attempt but I was actually pretty good at it (I think). After I realized my mistake I ran back inside grabbed my phone and took a video which I will attach at the bottom of this post. I need to continue working on my final cast I think. I can get lots of line out but it starts to pile up around 30 feet. The knot tying struggle definitely taught me a lot of patience and really tested my fine motor skills.

I forgot to take a picture of my albright knot and I wasn’t about to unspool my whole reel to take a picture of it so here is a picture of the fully spooled reel instead:

Here is a photo of the nail knot:

Here is a photo of the palomar knot and the fly:

Here is a photo of the other flys I found:

Here is a video of my casting practice in the yard:

Free Inquiry Post #1: My Rod

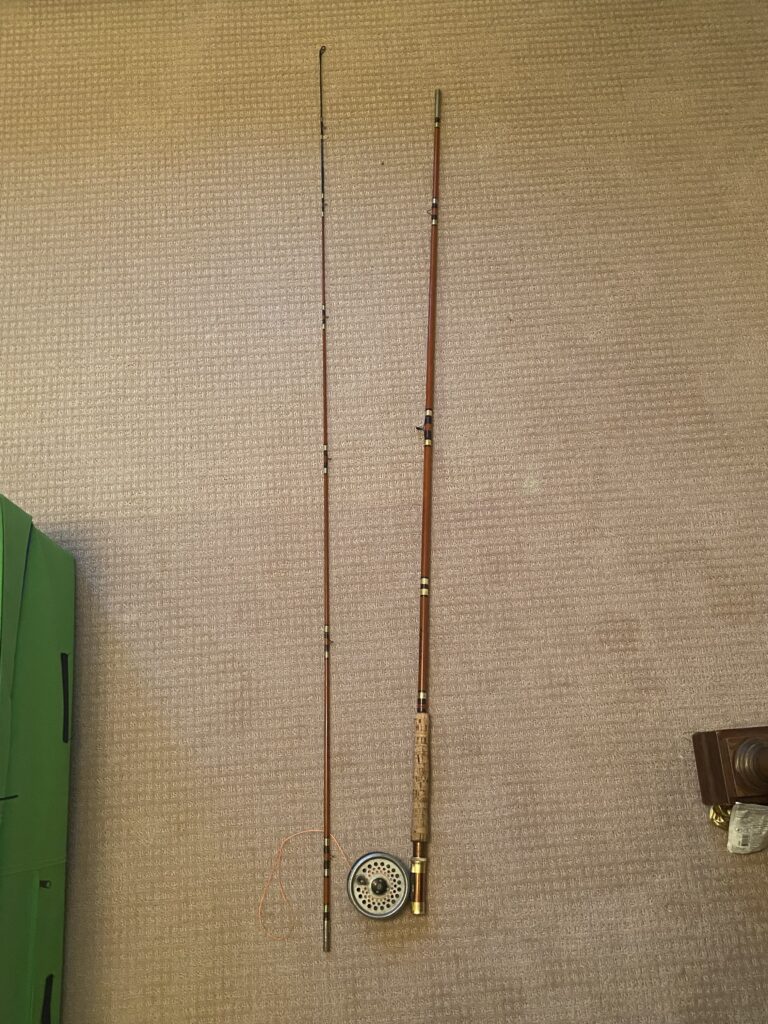
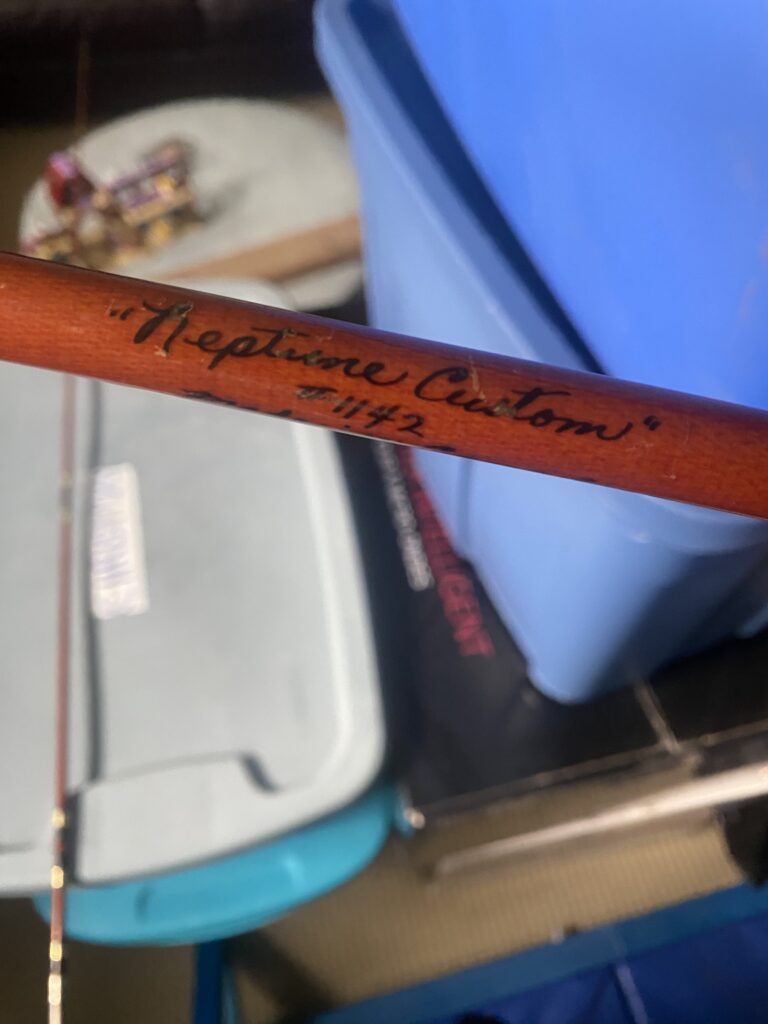
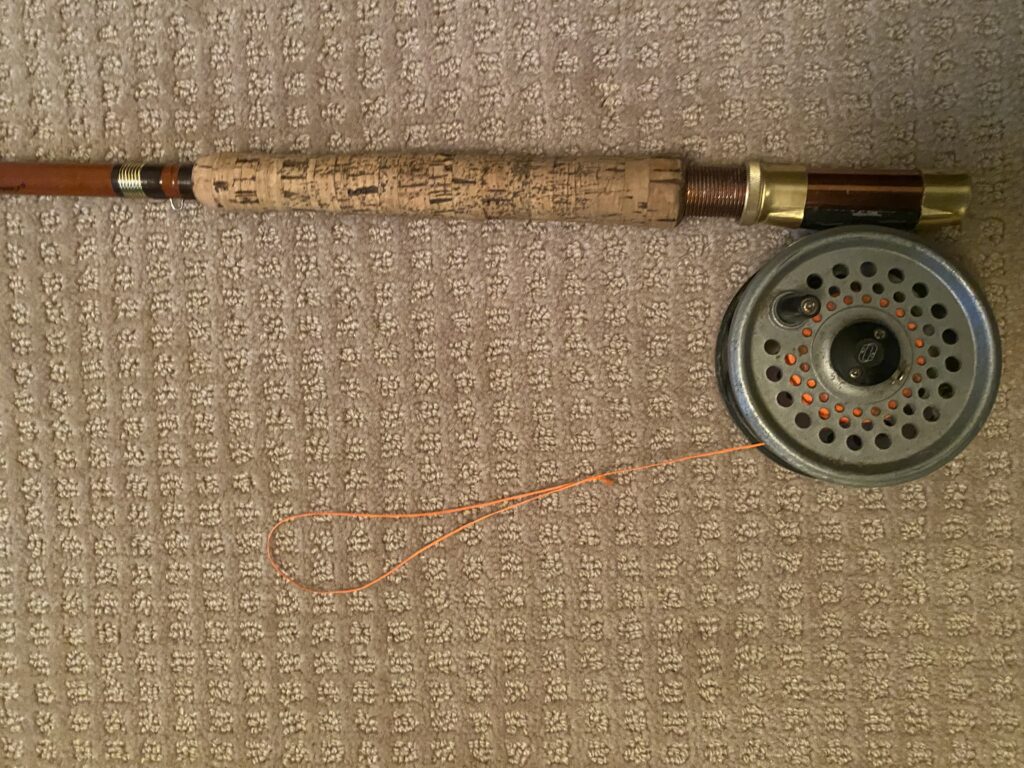
This weekend I drove back out to Sooke to pickup a fly rod and reel from my parent’s house. The reel already has backing line on it but I have no idea if it is still good. I figured learning to re line the rod/reel is a perfect place to start my inquiry. I began researching the line and was quickly surprised as the process itself is much different from a regular rod/reel and there are a few different things that go into choosing the right line. There are different weight lines, tapers (weight forward, double taper, and level), and different lines for different purposes (floating, sinking, and sink tip) https://theflyfishingbasics.com/fly-lines-101/. The first step was figuring out what fly line works best with my rod. My rod is fairly old and hand made in Canada. It doesn’t have the rod length or line weight listed on it, only its name, “Neptune Custom”, rod number, and “made in Canada”. I measured it and it’s 10.5 ft long and pretty wippy. I put this info and pictures of my rod into Chat GPT, it couldn’t identify a make or model but it recommended starting with a 7 wt weight forward floating (Wf7f) line and working from there. I also need to pick up some new backing line (the reel I found has some but it’s old) and a tapered leader. About 75-125 yards (depending on reel) of backing line is attached first using an arbor knot, it’s important to make sure there is tension on the line so that the line spools up tightly. The next step is attaching the fly line to the backing, there is usually a welded loop at the back of the fly line that can be easily cinched onto the backing and spooled up. The next step is attaching the leader once again using a welded loop and then pulling it through the rods eyes and attaching a fly (https://www.fishuntamed.com/blog/how-to-set-up-a-fly-reel). I plan to pickup the necessary line on Wednesday and practice my casting this week using YouTube videos to help model the correct movements. I plan to hike up into the Sooke hills in the next few weeks and try my luck at some remotely stocked lakes. Here is a picture of my rod:

Here is a photo of the reel itself and the old backing line.

Here is a quick and simple YouTube video that helped me a lot, especially with the knot tying.

Blog #1

Finally got this thing up and running. Ive never had a blog so I’m looking forward to documenting my learning explorations on this site.

Welcome and Introduction

Before proceeding with this first blog post, we expect you to consider your privacy preferences carefully and that you have considered the following options:

  1. Do you want to be online vs. offline?
  2. Do you want to use your name (or part thereof) vs. a pseudonym (e.g., West Coast Teacher)?
  3. Do you want to have your blog public vs. private? (Note, you can set individual blog posts private or password protected or have an entire blog set to private)
  4. Have you considered whether you are posting within or outside of Canada? This blog on opened.ca is hosted within Canada. That said, any public blog posts can have its content aggregated/curated onto social networks outside of Canada.

First tasks you might explore with your new blog:

  • Go into its admin panel found by adding /wp-admin at the end of your blog’s URL
  • Add new category or tags to organize your blog posts – found under “Posts” (but do not remove the pre-existing “EdTech” category or sub-categories, Free Inquiry and EdTech Inquiry). We have also pre-loaded the Teacher Education competencies as categories should you wish to use them to document your learning. If you would like to add more course categories, please do so (e.g., add EDCI 306A with no space for Music Ed, etc.)
  • See if your blog posts are appearing on the course website (you must have the course categories assigned to a post first and have provided your instructor with your blog URL)
  • Add pages
  • Embed images or set featured images and embed video in blog posts and pages (can be your own media or that found on the internet, but consider free or creative commons licensed works)
  • Under Appearance,
    • Select your preferred website theme and customize to your preferences (New title, etc.)
    • Customize menus & navigation
    • Use widgets to customize blog content and features
  • Delete this starter post (or switch it to draft status if you want to keep for reference)

Do consider creating categories for each course that you take should you wish to document your learning (or from professional learning activities outside of formal courses). Keep note, however, that you may wish to use the course topic as the category as opposed to the course number as those outside of your program would not be familiar with the number (e.g., we use “EdTech” instead of “edci336).

Lastly, as always, be aware of the FIPPA as it relates to privacy and share only those names/images that you have consent to use or are otherwise public figures. When in doubt, ask us.

Please also review the resources from our course website for getting started with blogging:

« Older posts

© 2026 Stewy Blogs

Theme by Anders NorenUp ↑